First impressions matter, and your passport photo is arguably the first official glimpse officials get of you. While a charming smile and neutral expression play a crucial role, don’t underestimate the power of good lighting. Harsh shadows, washed-out colors, and uneven illumination can transform a perfectly acceptable portrait into a frustrating rejection. Fear not, visa aspirants! This comprehensive guide delves into the best lighting techniques for your visa photo, ensuring you present your most professional and flattering self with every shutter click. Whether you’re basking in natural light by a window or navigating the world of artificial illuminators, discover the secrets to achieving passport photo perfection that reflects your true likeness and expedites your travel dreams.
Background for Visa Photos
In the realm of visa application procedures, the visa photo stands as a critical element, serving as a visual representation of the applicant. Beyond its role as a mere snapshot, the visa photo assumes significance as an essential tool for security verification and documentation purposes. Immigration authorities worldwide impose specific requirements on these photographs, demanding a level of precision and quality that transcends the conventional standards associated with casual photography.
The primary purpose of the background in a visa photo is to create a visually unobtrusive setting that emphasizes the subject’s face. The background should be chosen with meticulous care to avoid distractions and ensure the focus remains squarely on the individual being photographed. Typically, immigration guidelines stipulate that the background should be plain, light-colored, and free from patterns or textures that might interfere with facial recognition algorithms or create unnecessary visual clutter.
A neutral background not only enhances the clarity of the subject’s facial features but also facilitates a seamless integration of the photo into official documentation. Ideally, the background should be devoid of shadows, reflections, or any elements that might compromise the accuracy of the facial recognition process.
Furthermore, the choice of background extends beyond a simple aesthetic consideration; it aligns with the broader objective of creating standardized, easily verifiable visa photos. The uniformity in background selection contributes to a cohesive and professional appearance, essential in the context of international travel and the associated security protocols.
In conclusion, the background of a visa photo is not merely a canvas against which the subject is captured; it is a deliberate choice made to meet the stringent requirements of immigration authorities. The careful consideration of background elements ensures that the resulting visa photos are not only visually appealing but also comply with the specific standards mandated for such official documentation.
Choosing a Suitable Location
The selection of a suitable location for capturing visa photos is a pivotal step in ensuring the overall quality and compliance of the final images. The chosen environment plays a crucial role in achieving the desired clarity, neutrality, and professionalism required for official documentation.
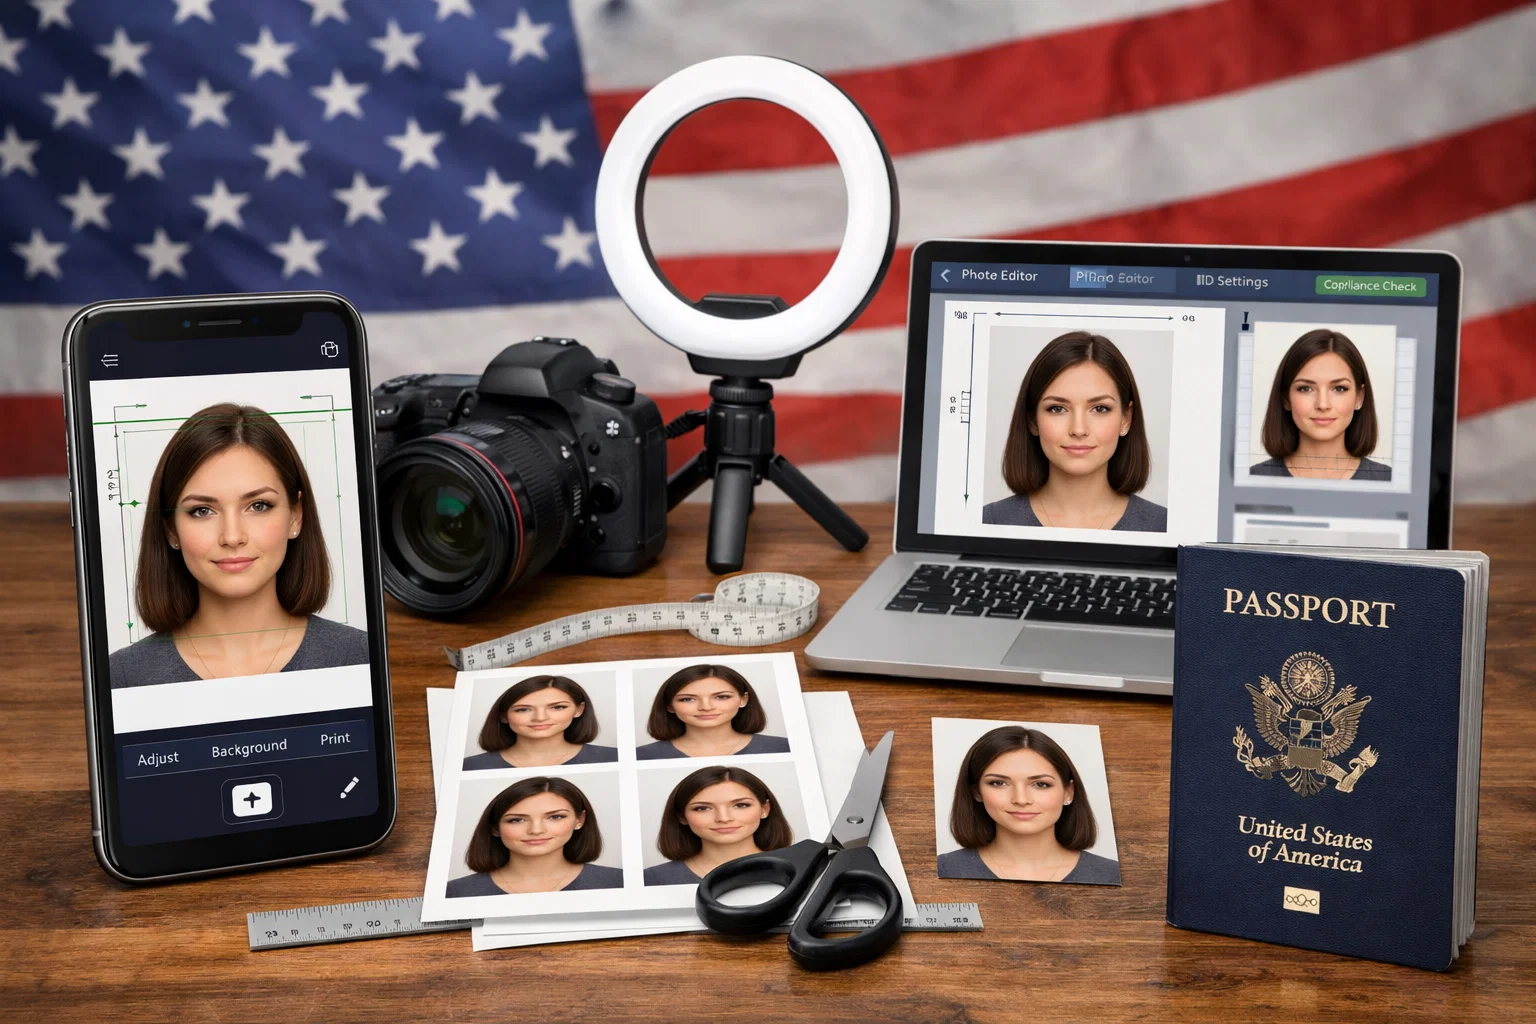
- Neutral and Well-lit Environment: Opt for a location that offers a neutral and well-lit environment. Natural light is often preferred, as it helps to create a soft, even illumination that reduces harsh shadows on the subject’s face. If using artificial lighting, ensure it mimics natural light as closely as possible. Avoid fluorescent or overly warm lighting, as it can distort the colors in the photograph.
- Plain, Light-Colored Background: The background of the chosen location is of utmost importance. Select a background that is plain, light-colored, and free from patterns or textures. This choice is in line with immigration guidelines, which often specify a background that allows for easy facial recognition and minimizes the risk of interference during the application process.
- Minimizing Distractions: The chosen location should be free from distractions that could divert attention from the subject. Busy or cluttered backgrounds can compromise the professional appearance of the photo and may not meet the standards set by immigration authorities. A clean, unobtrusive background contributes to a visually coherent image and facilitates a seamless integration of the photo into official documentation.
- Consideration of Privacy: When selecting a location, consider the privacy of the individual being photographed. Ensure that the chosen space allows for a comfortable and discreet photography session, respecting the sensitivity associated with capturing personal identification images.
- Adherence to Guidelines: Familiarize yourself with any specific guidelines provided by immigration authorities regarding the location and background of visa photos. Different countries may have distinct requirements, and adherence to these guidelines is crucial to ensure that the photos are accepted during the visa application process.
Camera and Equipment
Selecting the appropriate camera and equipment is paramount in achieving high-quality visa photos that meet the standards set by immigration authorities.
- Digital Single-Lens Reflex (DSLR) Camera: Opt for a DSLR camera with a high-resolution sensor. This ensures sharp and detailed images, contributing to the overall clarity and accuracy of the visa photo. The ability to capture fine details is crucial for facial recognition and verification processes.
- Sturdy Tripod: Use a sturdy tripod to stabilize the camera and prevent blurriness. A stable setup is essential for maintaining sharp focus and ensuring that the framing remains consistent throughout the photo session. A tripod is particularly useful in environments where natural light is limited, and longer exposure times may be necessary.
- Quality Lens: Choose a lens suitable for portraiture, such as a prime lens with a wide aperture (e.g., 50mm f/1.8). A wide aperture allows for a shallow depth of field, emphasizing the subject’s face while creating a pleasing background blur. This helps to draw attention to the essential elements of the photo and enhances the overall aesthetic quality.
- Remote Shutter Release: Consider using a remote shutter release or the camera’s self-timer function to minimize the risk of camera shake when taking the photograph. This is especially crucial in situations where touching the camera to trigger the shutter may introduce unwanted motion.
| Equipment | Recommendation | Additional Consideration |
| Camera | DSLR with a high-resolution sensor | Regular calibration and maintenance of the camera |
| Tripod | Sturdy tripod for stability | Ensure tripod stability on various surfaces |
| Lens | Prime lens with a wide aperture (e.g., 50mm f/1.8) | Check for dust or smudges regularly on the lens |
| Remote Shutter Release | Remote release or camera’s self-timer | Familiarize with the camera’s self-timer functionality |
Installation of Lighting
The installation of lighting is a critical aspect of capturing visa photos that are not only visually appealing but also meet the stringent requirements set by immigration authorities. Proper lighting enhances facial visibility, minimizes shadows, and contributes to a clear and accurate representation of the subject.
- Three-Point Lighting Setup: Employing a three-point lighting setup is a standard practice in portrait photography, and it proves particularly effective for visa photos.
- Use of Diffusers or Softboxes: To create a soft and flattering light, consider using diffusers or softboxes in conjunction with the lights. These accessories help to diffuse and soften the light, reducing harsh shadows and preventing glare on the subject’s face. Soft lighting is particularly beneficial in achieving an even and natural look, enhancing the overall quality of the visa photo.
- Avoiding Harsh Shadows and Highlights: Harsh shadows and highlights can compromise the quality of a visa photo. Carefully position the lights to minimize shadows, especially under the eyes and nose. Additionally, avoid overly bright highlights on the forehead, nose, or other facial features. Balancing the light distribution is essential to create a well-lit and professional-looking photograph.
- Adjusting Lighting for Skin Tone: Pay attention to the subject’s skin tone when setting up lighting. The aim is to achieve accurate color representation. Avoid lighting that casts unnatural tones or results in color imbalances. Adjust the color temperature of the lights to complement the subject’s skin tone and produce a true-to-life representation.
In conclusion, the careful installation of lighting, guided by the principles of a three-point setup and the use of diffusers or softboxes, contributes significantly to the creation of visa photos that are not only visually pleasing but also meet the stringent criteria established by immigration authorities. Adjusting lighting for skin tone and avoiding harsh shadows ensures that the resulting images are clear, accurate, and professional, facilitating a smoother visa application process.